UART Setup and Debugging for PS5
Jump to navigation
Jump to search
UART requirements
To perform UART communication on the PlayStation 5, you will need:
: Using a 5 V module will likely damage your console. See the gallery below for instructions on modifying your CH341A.
- wires (≤ 20 cm / 7.8 in)
: Longer cables can cause missing or corrupted log data during UART transfers.
UART pinouts by PS5 revision
The following diagrams show the UART test points for each PS5 PCB revision (thanks to User:Stetofix on YouTube for sharing these images):
- PS5 UART pinouts by PCB revision
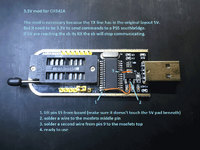
CH341A 3.3 V modification
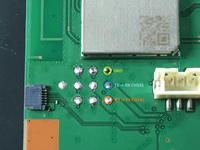
PCB revisions EDM-010 and EDM-020
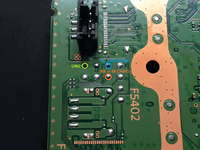
PCB revision EDM-03X
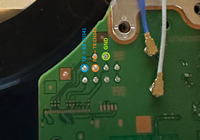
PCB revision EDM-04X


Performing a UART connection
Connect three wires between your UART module and the PS5 console:
- Connect TX (module) → RX (console)
- Connect RX (module) → TX (console)
- Connect GND (module) → GND (console)
It is crucial to match TX to RX; otherwise, you will receive no data.
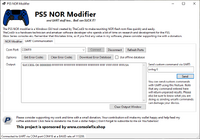
Using PS5 Nor Modifier
After wiring, connect your module to a computer and launch the external tool PS5 Nor Modifier:
- Source and downloads: GitHub – PS5 Nor Modifier
- PS5 Nor Modifier Tool
UART Communication Tab

Follow these steps:
- Open the application and select the UART Communication tab.
- Click Refresh Port and choose the COM port for your FT232RL or CH341A module.
- Click Connect.
- Power on the PS5 by pressing its power button while the tool is open.
- click Get Error Codes to display UART logs or error codes.